

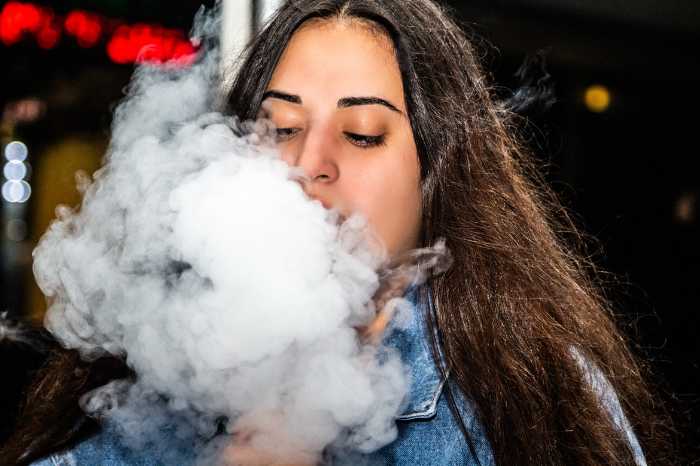
Many people are interested in the hookah-smoking experience, but not everyone know how to set up a hookah. If you're one of those people who wants to get into the world of hookahs but don't know where to start, this article is for you. Here's our step-by-step tutorial on how to set up your own hookah!
Hookahs, or water pipes, are traditional Middle Eastern smoking devices that have become popular across the globe. Taking a casual drag from a hookah is one thing, but setting it up is another.

How does Hookah work?
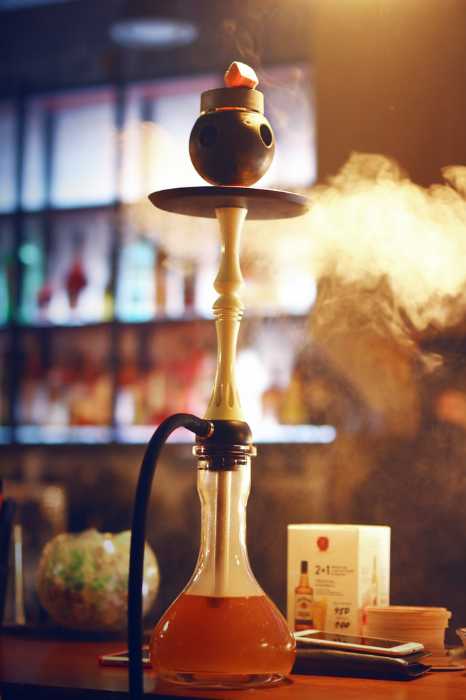
Hookahs are water pipes that are used to smoke tobacco-flavoured mixtures. They work by sending heated air through the tobacco and a water-filled vase.
The bowl is usually covered with a foil with holes, a metal plate, or a heat management device; HMD, where you put hot coals on top of the bowl. The warm coal heats the hookah tobacco within the bowl and produces smoke. A squeeze(inhale) from the hose draws tobacco from the hookah into the water. The smoke rises from the hookah base and enters one of those ports that lead into the pipes, producing a rich taste and cool smoke that is unique and relaxing.
Now that you know a little bit about how hookahs work, let's get started on setting one up!
Hookah guide for beginners
The process of putting together the hookah could be somewhat daunting but we are here to help. First, you need to learn the basic steps. In this blog post, you will find some tips on hookah setup and maintenance. There are so many methods and tricks for smoking hookahs. Once you learn the basic hookah techniques you can select what styles are most appropriate for you!
How to set up a hookah
1- Clean the hookah.
Before your first smoke, clean the hookah with water and a soft brush. Disconnect all components, wash or just wipe everything except the hose, then dry with a towel.
Before every session, however, clean the glass base and fill it with fresh water. Also, cleaning it after each session is recommended, especially if residue appears on the vase.
A thin long brush is necessary for reaching into the stem.
2- Fill the vase with cold water.
The vase is the large glass container at the base of the hookah. Fill it to the point where you cover one inch of the stem. It's important to leave breathing room to dilute the smoke and make it simple to draw on the hose. For a mini hookah, you can just cover half an inch of the stem to allow for air and have a simpler pull.
3- Adding ice (optional).
Hookah smoke, when drawn properly, is not anywhere near as harsh as cigarettes. A pleasant cold temperature, on the other hand, will make it even more fun. Some people prefer to add ice to the water to get that cool fresh feel when inhaling.
You may need to remove some of the water before adjusting it to the proper level, as demonstrated above.
4- Insert the hookah shaft into the base.
The stem is the metal piece at the bottom of the center hookah shaft.
Connect the shaft with the metal stem and insert it in the hookah vase. Fit the largest rubber seal at the bottom end of the shaft to ensure a snug fit between the shaft and the vase.
Lower the shaft into the base. Again, as previously mentioned, make sure that it's one inch deep in the water. If the seal isn't air-tight, smoke will be thin and difficult to pull.
If the rubber piece won't go in, moisten it with a little water or a bit of dish soap.
5- Connect the hookah hose.
Connect the hose on the side of the shaft. Just like the base, the connection should be airtight.
Check your water levels before connecting. If the water level is near your hose connection, the water could ruin your hose, and your smoking won't be smooth.
Tip: When you wash your hose, make sure it's completely dry before you use it again.
6-Check the air flow.
To prevent air from entering the hookah, place your palm over the hookah stem. Attempt to breathe via the hookah hose. If any connection allows any air through, one of them is not properly sealed. Make sure each fitting has a tight fit and uses a rubber or silicone seal. If you're missing a seal, look for "hookah grommets" to find a replacement.
A tightly wrapped athletic tape can make a temporary airtight seal.
7- Position the metal tray on top of the hookah stem.
If and when they drop, the tray traps hot ambers. You can also use it as a charcoal holder.
Smoking The Hookah
1-Stir the shisha tobacco.
Shisha is just crumbled tobacco leaves mixed is sweet molasses to add flavour and thick smoke. The liquid from the molasses tends to settle at the bottom of the container. Give the flavored tobacco a quick stir before you put it in the bowl.
For your first time smoking a hookah, consider using nicotine-free hookah tobacco to practice the setup. Nicotine is an addictive chemical, and tobacco can be very harsh for beginners.
Shisha comes in many different flavours, which significantly change the experience. As a novice hookah smoker, try sampling a variety of flavours to see which one you prefer.
Tip: You can mix 2 or 3 different flavours together.
2-Break up the shisha and place it in a hookah bowl.
In the hookah bowl, fluff up shards of shisha and drop them in. Some people like to flatten it down, but I don't recommend it. It should be loose enough so that air may easily flow through it.
Fill the hookah bowl nearly to the top, but leave at least 2mm of space above the tobacco so that it doesn't touch the aluminum foil. Your hookah session will last longer.
A word on hookah bowls:
A hookah bowl or head is usually made out of clay, glass, silicon ceramic, or aluminum. Each material has different characteristics. Also, some have one hole in the middle, others have 6 or 7 holes.
It is a matter of preference as to what kind of hookah bowl to use. Sample a different one until you are familiar and comfortable with it.
3- Cover the hookah bowl with aluminum foil, or HMD.
Put a piece of heavy-duty foil over the bowl, stretching it snugly. Crimple it around the edges to secure and make it air-tight.
If you only have a thin standard aluminum foil, you can use two layers.
About 12-15 holes should be poked through the foil surface with a toothpick or paper clip. Draw on the hose while testing airflow to see if it's adequate. If you have trouble drawing air, increase the number of holes.
Some people like to poke all the way through the middle of the shisha to provide channels for heat and air, but that's not necessary.
You can use a charcoal screen sold for this purpose instead of the foil or a heat management device.
Also please note that using foil that is pre-poked makes your life so much easier.
Tip: A foil poker is a useful tool for forming even precise holes in the foil.
4- Place the bowl on top of the hookah shaft.
For a secure airtight fit, use a rubber grommet to seal the hookah bowl into the shaft. Silicon bowls might not need the rubber grommets.
5- Light the hookah coals.
There are two types of coals used for hookah.
Follow these instructions depending on which one you have:
Quick light coals: Hold with hookah tongs over a nonflammable area. Light with a lighter or match until it stops smoking, then wait 10–30 seconds until covered in light gray ash and glowing orange. Quick lighting coals are convenient but give a bad, shorter smoke. Some people even get headaches from smoking them if they are not lit all the way through.
Natural coconut charcoals are the ideal option. They take longer to light but provide for a more substantial smoking experience. You will use less during your smoking sessions.
Heat directly on a stove flame or an electric burner. It takes a little less than 10 minutes to be ready.
Make sure they are lit all around.

Place the coals evenly around the edge of the foil, or slightly overhanging it. Piling the coals in the middle can quickly char the shisha and give harsh, short-lived smoke.
Avoid the common mistake of smoking right after you put the coals on. I recommend letting the shisha warm-up for 3–5 minutes before you start smoking. This lets you smoke with gentle breaths, enhancing the shisha tobacco flavour.
Tip: Never attempt to hold hot coals with your bare hands. Always use hookah tongs.
6- Start Smoking Hookah
After the bowl has warmed up, take a puff via the hookah hose. The coals should be red-hot. The air draws past the coals, which causes them to heat up. If you inhale too hard, the air will become hot enough to char the shisha and send you coughing with a lungful of bad-tasting smoke.
Pull with short, normal breaths. Smoke at a relaxed rate, pausing to give the shisha time to cool down.
If you detect too much smoke in the vase, blown-in so that the smoke escapes through the air vent. In hookah jargon, that is called purging.
Purging: When the smoke becomes harsh and fills the vase, the smoker blows air into the hose to let air escape thru the purge valve or valves. The purge valve serves as an exit-only valve to remove any smoke that may be trapped in the base of the hookah.
Remember to securely fit the hookah hose with a hose grommet if necessary before inserting it in the hose port. It's usually smaller than the bowl grommet.
When is it done?
A hookah session usually lasts between 1.5 and 2 hours if you are not sharing with other smokers. During this time, you will have consumed approximately 6 charcoals. You'll notice that the flavours in your smoke have become very faint by the end of it. Your session is finished when this happens.
Conclusion
If you're new to smoking hookah, or even if you're a seasoned smoker, it's important to know how to set up your hookah properly. This step-by-step tutorial will guide you through the process of setting up your own hookah at home. We've also included some how-tos and tips to get the most out of your smoking experience. So, whether you're just getting started or you're looking for ways to improve your smoking sessions, this article has got you covered. Enjoy!
We hope you'll have a better smoking session by following this
Have you tried smoking hookah before? What are your favorite flavors? Any recommendations or tips you would like to add?
Let us know in the comments section below!